Several days ago, while watching PM Artists Studio’s live stream, it hit me that I should make a Natasha bead from clay using their monthly color challenge.
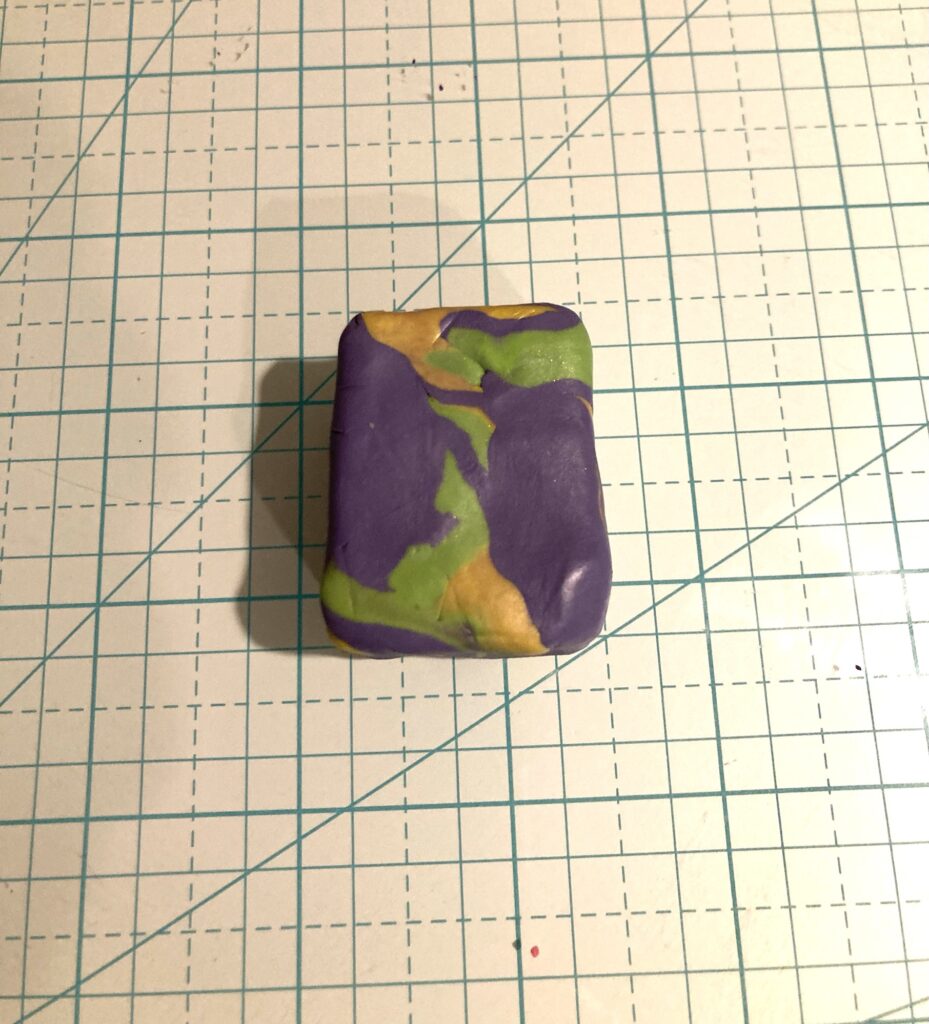
This month’s color challenge is spring green, lemon yellow and lilac. You can also add black, white and a metallic if you wish. I wasn’t in my studio, so I was lucky just to find a yellow, a green, and a favorite called gentle plum (Sculpey III.)
A couple of folks in the live stream chat wanted to know what a Natasha bead was. I explained as briefly as I could. You take several colors of polymer clay, chop them up, smoosh them together. Work them with your hands and twist them into ropes, folding them back on themselves. The working of the clay is called, conditioning, and is necessary for the alignment of molecules during curing (baking.) After conditioning, you shape your twisted glob of clay into a rectangular block and let it rest.
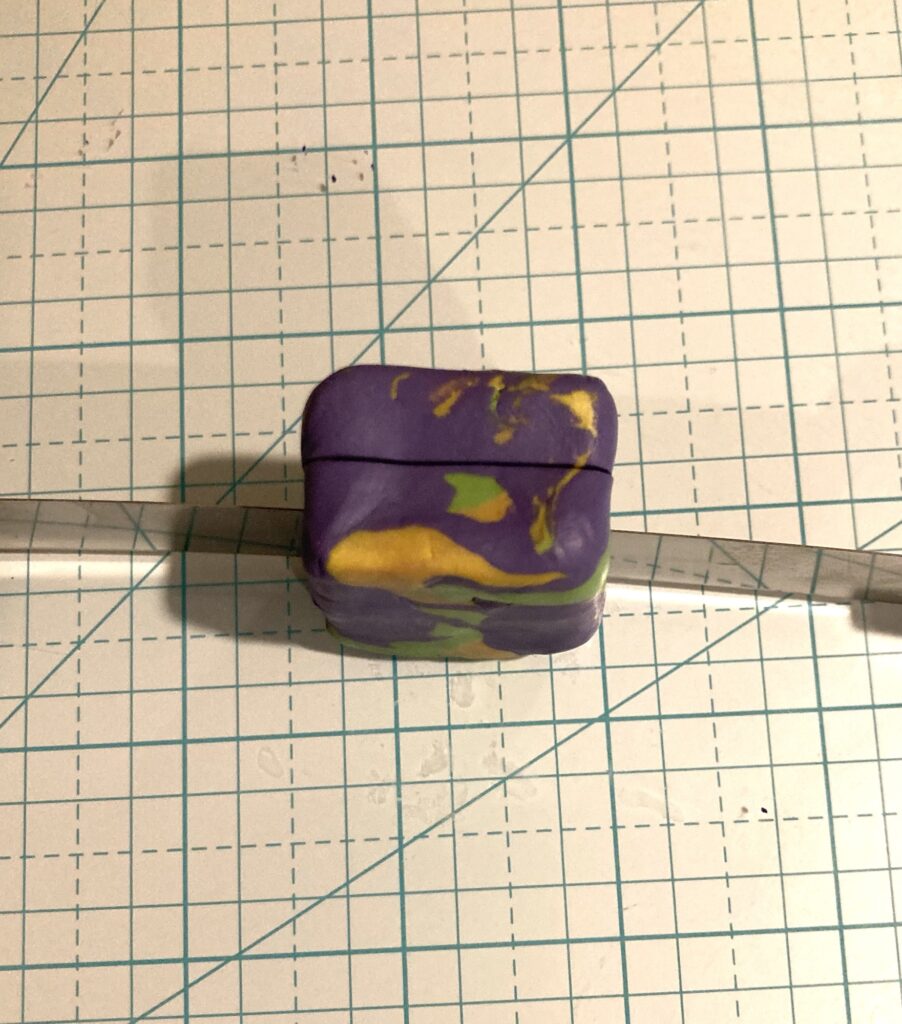
After the block is rested and firmed back up. Turn it on its side and slice it down the middle using a tissue blade.
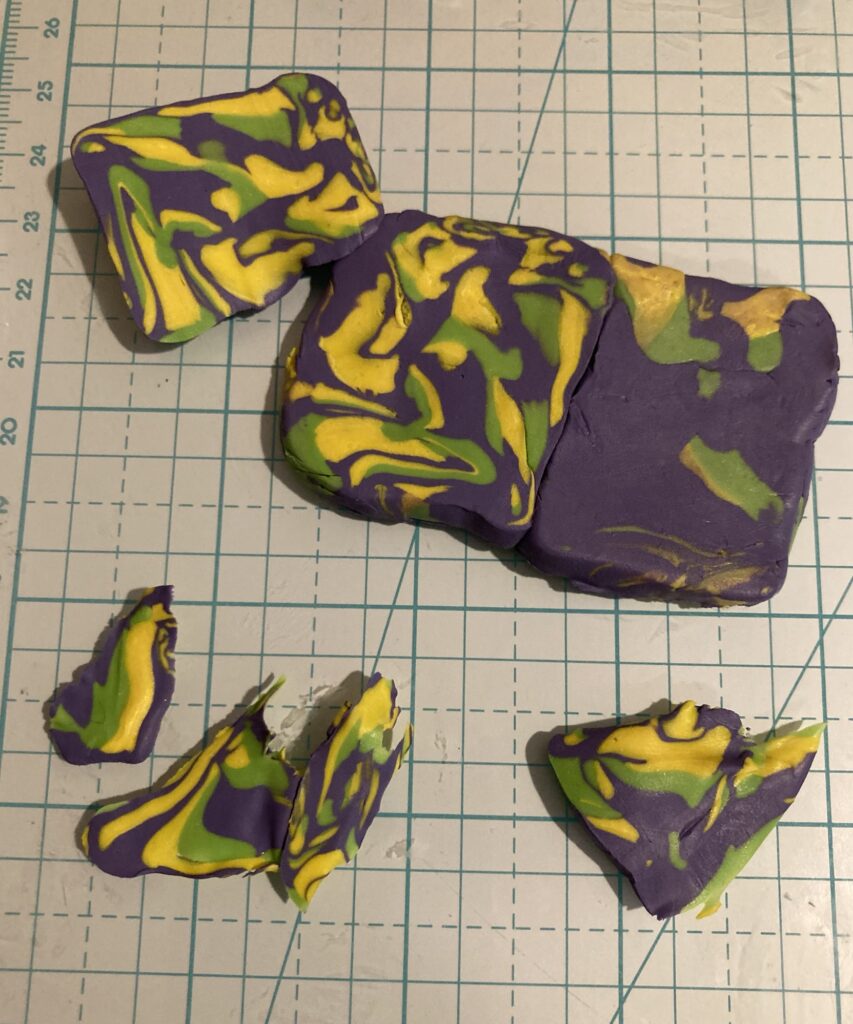
Open the cut block like a book and lay the two pieces side by side to mirror each other.

Gently smoosh or roll the two pieces together to adhere to one another. Mine was a little wonky due to the uneven cutting. I flipped it over and trimmed away the excess, again using the tissue blade.
Here’s the finished Natasha bead, resting.
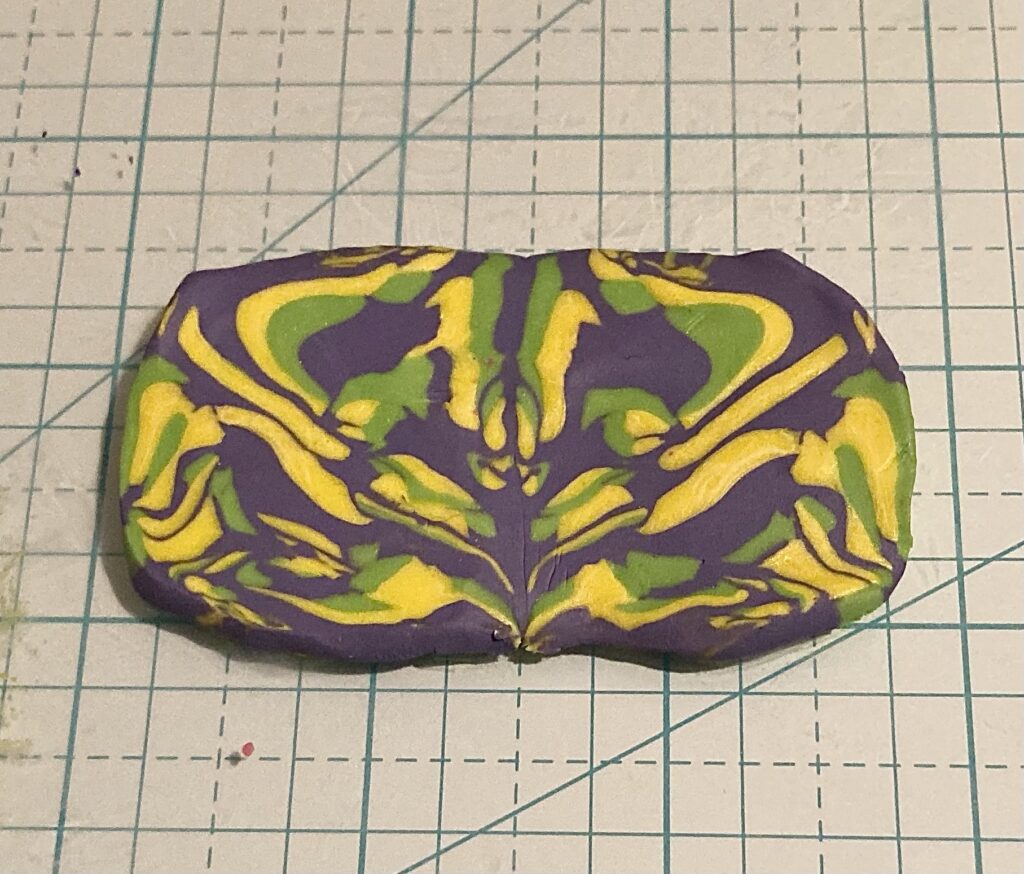
Before I bake it, I’ll punch two holes where antenna might be. After baking, I’ll add jump rings and chain, and make it a pendant!
#MakersCreativeCollab2024